Contemplating Defence

Last night’s Modern Spearhead game, a hasty attack by Andrew’s new Soviet Tank Regiment has me pondering yet again how to create an effective defence. Andrew has this wonderful ability to conjure up very different armies. I never really no if I will be fighting T-55s using second line equipment, Naval Infantry supported by PT-76s, helicopters and aircraft, or some new monster such as the T-80s I encountered last night.

I tend to think I can operate a flexible defence, especially with NATO, so that a specific battalion plays can change its role in the defence. An ability to react, reposition battalions and counterattack, are all key requirements. But yesterday’s massed armoured thrust caused me serious problems.

My French defend list comprised three battalions, or regiments in French organisation. Two mechanised, with AMX-30 tanks and AMX-10P mechanised infantry, while the the third was comprised infantry in VABs. Deployment required two battalions forward with a third in reserve and guarding the flank. I expected a pinning attack in the centre and a flanking action against my left flank. Other options, and there were several, could have had seen alternate avenues of advance. In my plan the most likely counterattacks would have been with my reserve or the VAB battalion against an exposed centre.

Above, part of the the French 1st Regiment (Battalion) in defensive positions. The town on the left was taken by Soviet Divisional Reconnaissance Battalion as stage one of a move against the French left. Below, the same position from a different angle showing more of the French centre and forward left, as well as the advancing Soviets.

Unfortunately my defence was almost immediately paralysed. I just didn’t feel I could effectively manoeuvre against a bristling armoured formation which would have seen the outnumbered and advancing AMX-30s stripped out by T-80s and the AMX-10Ps quickly overcome. Manoeuvring the VAB equipped battalion was even worse. Lacking any armour and with fewer Milans their ability to counter armour is much reduced in defence, never mind on the offensive.

Despite what must read like a degree despondency, the game was fascinating. The engagement opened with Soviet shaping of the area of operations with electronic warfare locating French air defences quickly followed by fires by BM-27 rocket launches and 2S5 artillery assets. Their was no Soviet aircraft though so this at least had limited impact. As the divisional reconnaissance moved towards its initial objective three tank battalions each allocated a BMP infantry company and some 2S1 artillery for direct fire support moved forward.

French artillery attempted to suppress the BMPs while the French infantry engaged with Milan. The terribly outnumbered AMX-30s gave a reasonable account of themselves but were silenced by return fire. Then, as the T-80s advanced they were engaged with Milan. Here at least there was some hope as the Soviets, despite heavy artillery fire had considerable difficulties dislodging the French infantry. French artillery continued to fire but their fires were interrupted by relocation – to avoid the expected devastating counter battery fires.

Above, a view from the Soviet lines. The BMPs are suppressed by artillery fires. A 2S1 can be seen behind the advancing T-80s. Below, the advanced French positions have been neutralised and Soviet armour continues forward. French artillery fires now target the T-80s in a desperate attempt to disrupt the attack.

So where does this leave me, or more accurately my French? Reasonably capable against Motor Rifle formations the defend list’s inability to be more than a speed bump to massed armour will certainly see me reevaluating it’s composition and, more importantly perhaps, it’s use…

Scenario Generation System

Due to some ISP changes, as well as an error on my part, the Scenario Generation System has been off-line recently. This has now been resolved and players wishing to download the Spearhead & Modern Spearhead Scenario Generation System can now do so again. I apologise for any inconvenience while the system was unavailable.

The Scenario Generation System, as well as supporting documentation for Modern Spearhead, can be found here.

Forming a Panzer Grenadier Brigade

I’ve always been somewhat surprised that the West Germans are infrequently seen in these parts. Especially as the West German formations formed the backbone of NATO armies by the 1980s. Continuing with my occasional posts on forming armies this article looks at forming a Panzer Grenadier Brigade for use in the Scenario Generation System.

Now, I suspect the use of West Germans formations under the Scenario Generation System is reduced by the points system. In particular West German formations are relatively expensive due to the use of IFVs. A contrast to the American M113 or British FV432 combat team which is relatively inexpensive. My West Germans were my first NATO army under Modern Spearhead and they remain an interesting, and I feel, capable army. As is the norm here I based my West Germans around 1982. The two lists I will present here are based around Panzer Grenadier Brigades and I feel provide a reasonably balanced force structure. However, rather than provide a list I hope a few of you find a little inspiration.

A Panzer Grenadier Brigade has four basic battalions. A Panzer Battalion, two Panzer Grenadier Battalions and a Mixed Battalion. The last having no HQ under peace conditions. Each battalion comprises three companies. These three companies can be cross-attached or operate without cross-attachment.

Let’s begin by looking at the armoured options. The Panzer Battalion comprises three companies and excludes an infantry component unless through cross-attachment. At the moment I have Leopard 1A2, Leopard 1A1A1 and Leopard IIs in my collection which allows me to model several different formations. For now I will focus on the Leopard 1s and will look at the Leopard 2 in another article.

The Leopard 1 went through several upgrades and for my purposes the Leopard 1A1A1 is the most common in 1982. It has many of the physical characteristics of the Leopard 1A5 allowing me to use the excellent Heroics & Ros Leopard 1A5 casting to represent the Leopard 1A1A1. Above, Leopard 1A1A1s supported by a company of Marder equipped panzer grenadiers. A Brigade HQ, represented by an M577 command stand, can be seen in the rear.

The Leopard 1A2 was produced as part of the 5th batch of Leopards. It was not upgraded during the main upgrade program. As a result, and most notably, it didn’t receive the add on turret armour. The model I have are, I believe, from Skytrex. These models were gifted to me several years ago by Steve Weiss a SH/MSH gamer in New York as part of an “moderns aid package”. Historically the Leopard 1A2 were mainly deployed in the 6th Panzer Grenadier Division. As such they often exercised with Danish forces. Below Leopard 1A2s, supported by a panzer grenadier company in M113 APCs, cross a small stream.

Each Panzer Grenadier Battalion comprised two companies mounted in Marders while the third is in M113s. Cross attachment, by company, is particularly important to achieve combined arms and I almost always base my battalions on a mix of companies. That said, as each platoon contains Milan a degree of independence can be maintained and a Panzer Grenadier Battalion could operate without panzers. One particular strength these battalions is the Marders. The Marder IFV, being a true mechanised infantry combat vehicle, provides considerable protection for the infantry from enemy artillery fires. This is especially so when under Soviet 122mm fires. In addition the combat factors, a result of the infantry, vehicle and ATGW systems, provide a capable system weapons system in 1982. In contrast the M113 mounted companies provide less offensive and defensive power but have a lower points cost.

In my view a critical part, and sometimes overlooked part of these Panzer Grenadier battalions, is the M113 mounted with a 120mm mortar. These indirect fire weapons provide each battalion with a degree of organic fire support. Useful, and almost always available, the are useful in suppressing enemy infantry. However, being self-propelled they are less prone to counter-battery fires, though do remember to move them frequently!

The fourth battalion is the Mixed Battalion. It comprises a panzer company and two panzer grenadier companies in Marders. Unlike the Panzer Grenadier battalions it lacks a mortar section and unless mobilised an HQ platoon. I believe that elements from the Brigade HQ form the headquarters, though details are conflicting. I have decided to represent this HQ by a Marder element.

Specialised anti-tank systems were a critical part of the West German force structure. Each brigade had one company. Some Brigades fielded the Jaguar 1 armed with the HOT ATGW system, which had mostly replaced the earlier Jaguar armed with ATGW SS11. Other brigades fielded a company of Jagdpanzer Kannone. I must admit my personal favourite is the old and increasingly ineffective Jagdpanzer Kannone which retained a 90mm gun. The 90mm guns were sourced from decommissioned M47 tanks and the vehicle has a number of similarities to the excellent, in WWII terms, Jagdpanzer IV.

Above, Jaguar 1s deployed along a woods edge, while below a company of Jagdpanzer Kannones deployed in ambush in field and woods. Many Kannones would be upgraded to Jaguar 2, armed with TOW, while others would soldier on in reserve formations until 1990.

Other core components of the brigade include the brigade’s own artillery battalion. Equipped with the excellent M109G with its improved howitzer with a range of 18,000m is effectively an M109A1. Self-propelled and held in brigade support it can be called in reasonably easily by fighting stands and recon elements. Divisional assets include additional artillery systems in the form of FH-70 towed guns and 110mm rocket battalions. Both are able to support with fires into the battle area. However, the FH-70 is useful for deep fire missions against enemy artillery or air defence systems. Very useful if your opponent plans to deploy towed artillery systems.

West German formations, unlike some NATO allies, had a solid anti-aircraft arsenal. Each division comprises specialist man portable SAM as well as Gepard self-propelled gun systems. This is further supplemented by Roland SAM at Corps level. Below, Gepards provide support for elements of a Panzer Grenadier Battalion.

Fixed wing air support has an ability to quickly overcome an enemy concentration. As importantly it can strike at any part of the brigade battle area. I usually ensure a Forward Air Controller is present, but when points are restricted a reconnaissance stand, an HQ and even fighting stands can request support.

Below, relatively inexpensive Alpha Jets overfly Luchs reconnaissance elements. These light attack aircraft can be armed with rockets, bombs or Improved Conventional Munitions (ICM). Consideration should be given to the weapon load. For example if the enemy is likely to be on the offensive ICM can be more useful than rockets.

However, to achieve success the enemy air defences must be reduced. The obvious way to do this is via artillery strikes on located radar SAM systems. However, Phantom fighter bombers can also be used. Their avionics and countermeasures are useful and potentially allow the use of weapons such as smart bombs to suppress enemy missile systems. Subsequent attacks can then be made by other aircraft armed with more traditional weapon loads.

The PAH-1 helicopter, armed with HOT, can be a useful weapons platform to countering enemy armour and for targeting AA systems allowing fixed wing support to be more effective. Like the fixed wing aircraft I tend to operate these as options in the list. This forces my opponent to consider his air defences in both attack or defensive postures, without me having to always commit to using a specific system each game.

Having described a few of the elements available I will now provide some sample lists which I hope provide some inspiration. You will note some companies are under strength, representing casualties. There are a couple of variations from the official TO&E, I will cover these off in future posts.

The Attack List is the most self explanatory. I see it being used hasty attack scenarios and for encounter situations, when the Scenario System selects this list. I don’t believe it is useful for or the West Germans in general should attempt a deliberate attack. It contains three manoeuvre battalions with reasonable indirect fire support. The Panzer Battalion could be used massed but more typically one or two companies are allocated out combined arms battalions. An under strength Jaguar company provides heavy ATGW support while a range of artillery is available. A range of options include fixed wing air support, additional artillery for counter-battery fires or air defence suppression. Care should be made when allocating resources to battalions so as the overall attachment limits are not exceeded. Of course the brigade is not well suited to frontal engagement, so try and use manoeuvre to gain advantage, forcing your enemy to redeploy. The sample Attack List can be found here.

The Defend List is more complicated and with fewer points more difficult to achieve meaningful combined arms. In defence the three battalions are thin on the ground and each is limited in armour. Unlike the previous list armour is already attached with one battalion of the brigade presumed to have been deployed elsewhere. The Mixed Battalion is small and should act as a mobile reserve reinforcing the other battalions. This not withstanding careful deployment of the fighting stands and support weapons will be required. Often a brigade commander will be tasked with a difficult situation or be on the offensive. In these situations the options can be selected to bolster the defence, disrupt the enemy or add teeth to the fighting battalions. Options include air support designed to attack advancing enemy vehicles, additional AA systems and additional artillery. The Option B is specifically design for the spoiling attack scenario where a commander conducts a preemptive attack before an opponent can launch a deliberate attack. This provides reinforcements, additional artillery and most importantly additional mechanised AA systems. The sample Defend List can be found here.

Hopefully this short primer will have been of use and just perhaps you will be tempted to deploy some West Germans to stop the WARPAC invasion…

Cold War French

French forces of the Cold War 1980s have an interesting selection of vehicles which have, for many years, had a certain appeal to me. As a result a few years ago, when I was looking for a Cold War project, the French were an obvious candidate.

I use the Scenario Generation System to generate most of my scenarios so it’s no surprise I used this as the basis for my forces. I then selected to build forces drawn from an armoured division. Interestingly, a French armoured division isn’t particularly large and can have a variable number of regiments. These divisions are larger than most NATO brigades but smaller than NATO divisions. Further, depending on which division is selected, a considerable range of equipment can be found. I found “Armies of NATO’s Central Front” by Isby & Camps particularly useful in determining the equipment make up of my initial force. However, have a look at my Cold War TO&E section for the basic organisations available.

When determining my force structure I felt that one armoured regiment, two mechanised regiments and an infantry regiment would provide the basics formations. To these basic regiments I would then add in various support units for variety.

Above, elements of an armoured regiment, AMX-30 tanks and AMX-10Ps, on the advance. Below, several platoons of a mechanised regiment deployed in defensive positions. The one in front of the town is considered to be deployed in the outskirts and receives a cover bonus.

Below, another view of elements of the mechanised regiment. This photo shows deployed Milan with the AMX-10P IFVs in support. All miniatures are from Heroics & Ros.

My Attack and Encounter List was built around three regiments, remember these are battalions. First, there is an under strength armoured regiment with a mechanised infantry company. The armour is not outstanding, but ideal for manoeuvre and can put down reasonable firepower. Secondly, there is a mechanised regiment, with elements from the two tank companies and the two mechanised infantry companies where the infantry have a Milan within each platoon. Both these regiments have the excellent AMX-10P which has proven useful as it provides a degree of protection for the infantry from artillery fire. Finally, an infantry regiment mounted in VABs, and without armour and fewer Milan per regiment, provides a reasonable covering battalion.

Support formations include a range of gun and AA systems, a useful divisional recon company and artillery. Options to reinforce the regiments depending on the scenario include Mirage fighter bombers, counter battery artillery and additional ATGM systems.

You can find a sample Attack List here. Several items have been included but the quantity set to zero. One obvious item not included is a Brigade HQ, as all regiments are under command of a Divisional HQ which is off table and therefore free.

Above, AA systems in the form of AMX-13 DCA armed with 30mm guns and AMX-30 Roland deployed on high ground. Where the French are lacking however is man portable SAM, a fact not lost on the French deployments to Chad which were bolstered by Stinger purchases.

I am a strong believer in fixed wing air support and initially the Mirage III is providing that role. The Mirage, when armed with Improved Conventional Munitions can be effective against counter attacking Soviet forces, so it’s ideal as an option in an encounter battle where it can quickly neutralise a threat.

The defend list was more problematic. Eventually I opted for three regiments but selected two mechanised regiments and an infantry regiment. As always hard choices need to be made when resources (points) are limited. The defend list is in some ways a misnomer. It is often used in encounter scenarios and it’s commander short on resources can find himself conducting limited advances or spoiling attacks.

A Defend list therefore needs to be self contained but, with additional support, capable of offensive action. Some specific consideration needs to be given to the options that the Scenario Generation System uses to convert a Defend List into a list in a Spoiling Attack Scenario. For this I have opted for additional support from Mirage fighter bombers and additional artillery systems. You can find a sample Defend List here.

One variation of the above, and one I particularly like, is the use of various armoured cars. By 1984 the AMX-10RC, as shown above, was in service. Armed with a 105mm gun it provides excellent firepower if weak on defensive capabilities. 

Above and below views of AMX-10RC armoured cars advancing with a divisional recon company in jeeps.

I see the AMX-10RC being most useful in defence, where they provide ambush fire on advancing enemy formations. I also need to try a couple of other armoured car types, some of which look particularly unusual! Perhaps this last point is important and something I like about my Cold War French – they make a change from the normal Americans and British.

Erlabrunn Heights

Major General Viktor Golubev’s was pleased with the recent engagement against the British at Dielingdorf, where the British defenders were shattered after a brief, but determined action. Briefly he considered what could happen if the next line of British defences were breached. Could the Soviet armoured reserves be then committed to the next phase of operations? The roar of a T-64 engine only metres away however bought him back to the task at hand. He regained focus, before such things could be considered he needed to brush aside the British now blocking his advance.

The British commander had approached his brigade’s defensive in an interesting manner, if the reports of the reconnaissance teams were accurate. Strong dispositions were detected on the left, perhaps two battalions, where the key ground was well protected. Meanwhile on the Soviet right a withdrawn battalion dominated the high ground near Erlabrunn. However an equally important ridge further was unoccupied. Of more concern was in the centre where the town of Augsdorf seemed undefended. Was it a trap, which would result in his forces being engaged in costly attacks on Augsdorf, or could were the British forces stretched extremely thinnly and could they be dislocated by a rapid drive forward?

Above, the area of operations viewed from the south. The British right is in the foreground, while Erlabrunn is visible in the top left. The town on the right centre is Augsdorf and is one of five objectives, others are marked by red markers.

Above, the British right, while below the British left near Erlabrunn. Chieftain tanks supported by mechanised infantry are well positioned for defence. Note the three bridges dominated by the Erlabrunn Heights, two of which would see much fighting.

Golubev’s plan was without doubt complex. Part of his plan allowed for further reconnaissance after which reserve battalions would be committed. In addition advanced units could approach their final objective, the Erlabrunn Heights on the British right. The combination of reserves, flank movements and reconnaissance would, he hoped, confuse the British defenders of the Soviet final main effort. The phases can be described as follows:

Phase 1: 1st Battalion of the 68th Guards Motor Rifle Regiment (1/68th), equipped with BMPs, would advance on the right against the British left, crossing the FEBA at 1600, turn 1. The battalion would ignore the high ground on its left but rather mass on the right of a small river for future attacks. After advancing 3km the battalion would deploy into defensive positions around 1730. 2/68th meanwhile would conduct a deep flanking move designed to arrive in the area of operations at 1900, or turn 6.

Phase 2: At 1630, turn 2, the Divisional Reconnaissance Company would advance towards and through Augsdorf. As 1/68th battalion went into defensive positions the reconnaissance company would complete its sweep of Augsdorf. Should Augsdorf be undefended the company would continue west before seizing an area of wooded high ground. Here it would act as a covering force for operations on the right.

Phase 3: With the planned flanking movement by 2/68th due to arrive at 1900 the advanced 1/68th BMP battalion would at 1930 renew its advance. This would be combined with Hind gunships which would fly over the advancing troops and engage the main British positions around the Erlabrunn Heights.

Phase 3: 1st Battalion of the 244th Guards Motor Rifle Regiment, operating BTR-60s and supported by a company of T-62s tanks, was held in reserve. At 1930 it was envisaged it would move directly forward and add weight to the attacks conducted by the battalions of 68th Motor Rifle Division. At this time the enemy would be aware of the focus of the main effort and would likely reinforce his left flank with one battalion.

Phase 4: The 2nd Battalion of 244th Guards Motor Rifle Regiment would either remain in reserve, being a threat in being, or sweep forward to secure Augsdorf, assuming it was clear.

Each Motor Rifle Regiment would be supported by the regiment’s own 122mm artillery battalion. The attack would  further supported by two additional 152 battalions drawn from division. Air defences comprised layered SAM systems combining battalion, regimental and higher level assets.

Above, 1st Battalion of the 68th Guards Motor Rifle Regiment moves forward towards Erlabrunn which is visible in the distance. Below the battalion deployed into defensive positions near Erlabrunn awaiting the next phase, a timed order.

In the centre the Divisional Reconnaissance Company, comprised of BRDM-2 armoured cars moves towards Augsdorf. The Soviet commander was concerned a detached infantry company could be deployed here. As it transpired it was not garrisoned and the armoured cars continued forward.

By 1500 the British commander had begun to reposition his forces, moving his right flank reserve towards his left. At 1930 the Soviet 2nd Battalion of the 68th Guards Motor Rifle Regiment moved into the area of operations and both battalions moved into the attack.

With the situation now changing rapidly both battalions of the 244th Guards Motor Rifle battalion were ordered forward.

Above, the general situation with 244th MTR in the foreground and 68th MTR moving to the attack in the top right. The Divisional Reconnaissance Company is visible in the top left and is about to be engaged by British forces, as can be seen below. Interestingly British fire here was relatively ineffective allowing the reconnaissance elements to begin a withdrawal. While eventually the company broke they gained valuable time for other forces.

Around Erlabrunn the fighting was intense. As two BMP battalions began their attacks Hind helicopters moved in to eliminate British tanks. Yet it was far from one sided. Well trained Chieftain crews targeted advancing T-64s causing heavy casualties while artillery strikes focussed on supporting Soviet infantry. In retaliation Soviet forward observers requested fire from 152mm self-propelled artillery and caused heavy casualties among the British mechanised infantry.

Soon British counter-battery fires fell on Soviet artillery, though with limited impact. However, British electronic warfare teams were more effective. Having abandoned their usual task of silencing SAM systems they instead focussed on identifying command and control systems. Soviet radio traffic was however limited and instead artillery fires by heavy artillery switched from suppressing 2S3 artillery assets to targeting forward observers.

Meanwhile the other British battalions were now on the move and the Soviet left was under significant pressure as two British battalions engaged a single Soviet battalion deployed in and around Augsdorf.

Below, the British move towards Augsdorf to the right of this photo. Here the T-62 tanks struggled to slow the advance of Chieftains and mechanised infantry, though ATGWs caused some casualties.

However, the advancing Soviets continued to bring pressure around Erlabrunn where combinations of tanks, motorised infantry and artillery stripped away the outnumbered British defenders.

Above, T-62s and motorised infantry engage the British defenders around while Hind helicopters, hopelessly ineffective, engage British Blowpipe teams in the background. Below, the 2nd BMP battalion engage the opposite end of the British Erlabrunn position.

With light fading around 2200 hours the defenders of Erlabrunn Heights, having suffered heavy casualties, began to fall back. Their position had becoming untenable, yet isolated platoons held on preventing the Soviets from securing their final objectives. The much needed Soviet breakthrough had not been achieved, the British had finally stopped the Soviet Bear!

The game was an outstanding success for both players with intense moments as two competing plans developed and played out. From a scenario perspective the scenario was developed with the Scenario Generation System with the British commander selecting to reinforce his defend list with an Option A, while the Soviet player conducted a Hasty Attack without reinforcement. Consulting the victory conditions, and accounting for reinforcements, the game was a narrow winning 5-4 draw to the Soviets. The game, viewed from the British player perspective, can be found here

Building a Soviet List

Having been asked for a couple of orders of battle from recent games I thought a good place to start was a current list I’ve been experimenting with. That is the Soviet list, with a couple of modifications, I used in the “Golubev’s Gamble” scenario.

I of course generally use the Scenario Generation System to generate my games, so the following is based around this system. In particular a scenario set in the 1980s involving an Attack or Encounter List has a 850 points budget. This basic 850 point list can be further supplemented by a selection of options.

In the past I have based a number of lists on a single Soviet Motor Rifle Regiment with a range of supports. However, I recently used a list based on two under strength regiments. Now, in these previous lists I alternate between formations built around BMP and BTR Regiments. I have a preference for BMP based Motor Rifle Regiments, as tracked vehicles are not slowed by hills and fields which feature often on our gaming table. However, historically a greater number of regiments in a Motor Rifle Division were equipped with BTRs. Therefore I frequently field BTR based regiments. After all the Scenario System works best if different formations are used. This time however I opted for a mix.

You can download a copy of the Soviet Order of Battle I used in “Golubev’s Gamble” scenario here.

As you can see there are four manoeuvre battalions. On the offensive a single battalion can be suffer casualties quickly therefore operating them as a regiment allows more firepower to be concentrated. However, with four battalions on the table points will always be at a premium. As a result each of the battalions is under strength. Of course if you are considering using this list feel free to change the composition of the battalions. Possible options I have considered are changing the tank types, reducing AA or adding in additional fighting or support stands.

One of the challenging aspects of Modern Spearhead is the allocation of resources in the planning phase even before the models are placed on the table.

With one of my regular opponents often fielding fixed wing and rotary air support this list is reasonably well equipped with AA systems both on and off-table. Reading some of the reports of previous games you will see one of my opponents frequently attempts to silence my off table SAM systems using M107 guns. As a result I’ve selected off-table SAM which are well out of range of his guns. However, these M107s, when not targeting SAM systems, will be firing counter-battery fires. In an attempt to disrupt these fires I have selected a battalion of M-1955 guns with for my own counter-battery fires. A slightly less expensive option would be towed S-23 180mm guns or perhaps even another battalion of 2S3 for more direct support of my attack. However, unlike the M-1955s both can easily be targeted by the M107s. Clearly each has strengths and weaknesses.

I have only added one Option A into the list. I need to expand some of these options in future, but with the enemy “listening” I can’t give too much away. In general I use the optional reinforcements to add variety and potentially catch an opponent off-guard. Over the years I have found fixed wing air support useful as such attacks can be overwhelming forcing a sudden and critical outcome. Even a weak air attack can be useful as it reminds an opponent of the need for his own AA. In this list the Mig-23s are armed with Improved Conventional Munitions, a useful weapons load against an enemy conducting a counterattack. In my most recent game the air support wasn’t called in, but I imagine next time it will. Certainly it will if I can silence his SAM, but that’s for another time.

Golubev’s Gamble

Major General Viktor Golubev’s pondered the maps in front of him. Yet again he was committing elements of his division, the 27th Guards Motor Rifle Division, in a hasty attack against the British, the second time in less than 24 hours. Desperately he hoped that the division would achieve the much needed breakthrough, especially given the divisions political officer seemed to be particularly interested in the divisions performance…

The battle area comprised the town of Dielingdorf in the southwest. From here a long ridge dominated the battle area as it travelled in a generally northeasterly direction. High points on the ridge were clearly critical objectives as they provided excellent observation points. Three other points of high ground were also critical, as the dominated the road network in the area. Reconnaissance indicated the British were deployed in brigade strength centred on three areas with each likely to be battalion strength. The British left was well forward at the northeastern end of the ridge, while the two remaining battalions were deployed further back. That of the centre seemed to be armour heavy.

Reports from regimental reconnaissance assets indicated two key heights on the left were not held. An obvious plan was a main attack here which would secure two objectives easily. Then a second stage operation, possibly with a deep flanking movement through Dielingdorf to unhinge the British right flank. Below, a portion of the British right flank viewed from the east, where such an attack would have fallen. Dielingdorf is to the left and not shown.

The British right, the left in the photo, is held by a mechanised infantry battalion while the British centre is held by elements of an armoured heavy battalion sized formation. Both are reinforced by ATGW systems. Of course at the time of planning this level of detail was not available to the Soviets. One of the two undefended objectives is in the foreground.

After some consideration Golubev’s opted for an alternate attack to which he allocated elements of two regiments. The 68th Guards Motor Rifle Regiment equipped with BMPs, and the 243rd Guards Motor Rifle Regiment operating BTR-60s. Each regiment would attack with two battalions forward, with each battalion supported by a company of the respective regiments T-64B tanks.

One battalion of 243rd MTR (BTR) would advance in extended order secure the two outlying and undefeated objectives in the southern sector. The battalion operating with little support was exposed to ambush by concealed British covering forces. Once these two objectives were secured the battalion would deploy into defensive positions. The focus of this defensive posture was in the centre where the battalions attached T-64Bs could provide a degree of protection to the main attack.

This main effort would comprise the second battalion of the 243rd MTR (BTR) and the 1st Battalion 68th MTR (BMP) with both battalions attacking the British positions on the northeastern end of the Dielingdorf ridge. The BTRs would likely be attacking frontally, before swing southwest, while the BMPs would attack along the length of the ridge. Meanwhile the second battalion of the 68th MTR (BMP) would conduct a short flank march. The battalion would attacking the rear of the British position before pressing deeper into the British rear capturing a second area of high ground. Attached to this flanking movement was the divisional reconnaissance company, which was tasked with pressing forward at speed to secure this position.

Each regiment would have the support of its own 122mm artillery battalion, limited fires from a divisional 152mm battalion. Further, towed 203mm guns were on-call for SAM suppression and counter battery fires. The divisional area was well protected by long SAM while each battalion was supported by a range of AA systems. Finally, several flights of Mig-23 and SU-7s were on call for ground attack.

Above, the British left flank well forward. To the left the the British centre is visible, well back, while in the rear the secondary objective of the 2/68th MTR battalion.

By 9am the Soviet forces had crossed their start lines. In the south 1/243rd MTR pressed forward over open ground towards its two objectives. Below, two companies of BTRs move through an area of fields. The battalions integral 120mm mortar company begins to deploy to while T-64Bs, drawn from the regiment’s tank battalion advance in support. Each battalion was supported by either SA-9 Gaskin or ZSU-23-4 self propelled AA as well as SA-7.

Below, a general view of the battle with the Soviets advancing from the left. The two sections of the Dielingdorf Ridge are clearly visible. Dielingdorf itself is visible in the very top centre. Objectives are marked by red markers. Three Soviet battalions are visible with a BMP and BTR battalion in the left foreground.

Unlike the Soviet left, the main attack on the right, against the British left was engaged almost immediately. British Chieftains tanks focused their efforts in engaging Soviet tanks at extreme range. However the orientation of the Soviet attack meant not all British tanks were able to engage.

Below, British combat teams on the heights reposition while one Chieftain troop pivots to engage. On the right British Milan teams deployed in a wood engage T-64s of the 1/68th MTR Battalion while Chieftains deployed near the British Battalion HQ in a farm add their weight. During this part of the attack British artillery was particularly active. From the high ground on the ridge British forward observers called in a near unceasing artillery fires on BMPs of the 68th MTR.

Lieutenant Colonel Anatoly Borovkov, commanding the 1st Battalion of the 68th Motor Rifle Regiment provides a brief overview of the initial engagement from his journal:

“The battalion’s BMPs, advanced rapidly towards the ridge with the tanks in close support. As we crested the ridge just after around 9.30am we were met by a storm of fire from British tanks some 1500 yards distant and ATGWs launched from a wooded area 1000m to our front. Much to our relief the fire was generally ineffective. A stark contrast to the hell produced by the relentless artillery fires that focussed on the BMPs. Several vehicles were decimated by direct hits while others were disrupted by the continual pounding. However, junior officers quickly regained control and while our tanks engaged the enemy armour the rifle companies pressed forward engaging enemy infantry.”

Despite a determined effort by British EW teams to jam radio communications Soviet forward observers were soon directing 122mm and 152mm fires at identified enemy positions. Later they would be reinforced by the 120mm tubes of each battalion. The 2S3 battalion allocated to the attack was quickly located and struck by M107 counter battery fires.

Above, the BTR battalion continues to advance. The wooded area and the ridge both caused some delay to the BTRs. Attached to this battalion was an air ground controller. As soon as the Divisional EW teams had accurately located enemy SAM sites dedicated artillery battalions were to conduct SAM suppression fires. Then Mig-23s and SU-7s were to be unleashed. Unfortunately, the British Rapier crews were well trained and frequently turned off their radar frustrating the Soviet attempts to locate them.

While the attack on the British left flank hung in the balance the 1st BTR battalion completed its advance in the Soviet centre and left. Above, 1/243rd MTR Battalion secures its objectives. As they did the attached T-64s deployed to cover the flank. In the distance elements of a British armoured regiment can be seen moving to support the battalion further along the ridge.

Below, a view of the advancing British regiment. Shortly after the T-64 company engaged the British Regiment’s right flank at ranges of 1500.

However, it was on the British left that the battle was to be decided. Finally, the 2nd BMP battalion from 68th Motor Rifle Regiment entered the battle space. While one company moved into the flank of a wood marking the British extreme left two additional BMP companies, supported by attached tanks, pressed deep into the British rear. Simultaneously the divisional Reconnaissance company, acting as a flank guard, moved against the battalion’s follow-on objectives.

Above, the battalion advances on the now exposed British left. The British Battalion HQ is located in the farm area, while rear area SAM are further to the rear.

Below, the overall situation. The BRDMs of the Reconnaissance Company can be seen in the right foreground moving at speed. Their objective is the hill in the right foreground.

At this point the British battalion on the northeastern section of Dielingdorf Ridge, broke having suffered heavy casualties. As it fell back in retreat Soviet forces consolidated their position on the ridge while the 2nd BMP Battalion pressed forward.

This Hasty Attack scenario was developed using the Scenario Generation System. Both players supported their main forces with an Option A reinforcement. Under the scenario the general location of the British forces were known when Soviet planning was completed, but not the actual dispositions. It was later revealed that the British commander had set deployed a trap, using undefended objectives, to lure the Soviets forward into a prepared killing zones. The alternate Soviet plan had been, without doubt, a significant gamble which could have gone very wrong. Indeed, during the course of the attack there were several critical moments the British, despite being outnumbered, looked likely to break at least one, possibly two, attacking Soviet battalions. Such a situation would have unraveled Golubev’s attack. In the end however the arrival of the flank marching battalion decimated the already unhinged the British defence. A fascinating, and very well balanced action. I look forward to another…

Achtung Panzer!

Three days had passed since the invasion began. During these desperate days both NATO and WARPAC formations had suffered heavy losses and both were committing reserve formations, or in the case of the Soviets, follow-on formations. Generalmajor Hans-Henning von Sandrart, commander of 11th Panzer Grenadier Division, had allocated one of his brigades, the 32nd Panzergrenadier Brigade, to hold the left flank of his divisional room. Opposite, his Soviet counterparts were committing elements of a reserve Motor Rifle Division, moved west prior to the offensive. Now, elements of this fresh division were advancing in a hasty attack on the West Germans.

The commander of 32nd Panzergrenadier Brigade, Ludwig Esebeck, had under command three battalions. They were the 311th Panzergrenadier Battalion, the 312th Panzergrenadier and the 313th Panzergrenadier. Each comprised three companies one of which was of Leopard 1A1A1 tanks. In direct support were various AA systems and the brigades artillery battalion. Available for counter battery fires was a battalion of M107 self-propelled artillery.

The brigade’s operational room was considerable, especially for an understrenth formation. Divisional intelligence expected the initial Soviet formations would comprise two Motor Rifle Regiments supported by artillery and fixed wing aircraft operating in close support. Based on this scenario, and with limited resources, Esebeck opted to deploy two battalions forward on a key ridge with a company of each battalion holding flank positions.

Above, the main ridge flanked by a town on the left and a village on the right.

The brigade’s third battalion, the 311th, would hold the brigade’s left but would deploy considerably further back. Likely routes of advance were covered and each battalion had local reserves. However, should the enemy advance along an unexpected route, Esebeck determined his small battalions would operate in a flexible defence. Following standard doctrine each would be prepared to reposition to reinforce another.

Below, the general situation with the Soviets entering from the left. The German left flank is in the right foreground.

Soviet forces were soon on the move and advanced German forces reported several Soviet tanks battalions supported by BMPs, along with BTR mounted infantry moving against the 32nd Brigade’s left flank. Indeed, as reports came in from advance positions it was soon clear that an entire Soviet Tank Regiment, comprising T-55s, T-62s and BMPs, was advancing at speed. This regiment was supported by significant portions of a BTR Regiment. It seemed the intelligence officers were mistaken in their assessment!

Below, the Soviets advance with a tank regiment in the foreground. The BTR battalions are just visible in the distance and are themselves supported by tanks and ATGW systems and self-propelled artillery.

Below, elements of the 311th Panzergrenadier Battalion prepare to engage the Soviets. The small village of Gerbertshofen can be seen on the left, complete with a garrison of a single panzergrenadier platoon.

The advancing Soviets Motor Rifle battalions were first to be engaged when Panzergrenadiers in Gerbertshofen requestedfire support from the brigade’s 155mm artillery. A series of accurate fires destroyed a company of advancing infantry. This was soon supplemented by direct fire from supporting Leopards.

Below, the Soviet attack presses forward. Gerbertshofen has now been reinforced in an attempt to prevent a direct attack. Casualties on the German Panzers are now mounting as the Soviet armour engages. While German artillery fires continue to cause heavy casualties on Soviet infantry. However, without a dedicated artillery observer the fires are not always concentrated falling on three seperate Soviet battalions.

While the Soviet attack clashed with Panzergrenadiers and Leopards around Gerbertshofen, the battalion’s left flank began to fall back towards higher ground in an effort to further protect the battalion’s flank. Below, a Marder equipped company can be seen in its revised position. On the hill Gepard AA remain vigilant. The red marker denotes a game objective.

It had been apparent for some time that the 311th Battalion was under heavy pressure. As a result Esebeck ordered the 312th Panzergrenadier Battalion to move to support it. This was to be completed in two phases to prevent additional Soviet formations attacking and securing key positions in the centre and right. In turn the 313th Panzergrenadier Battalion would reposition to a more central position.

Above, 312th Panzergrenadier Battalion conducts its second phase move. 313th Battalion, partly visible in the top right, will next reposition on the ridge. German tactical flexibility here was extremely important and each order change was successful despite Soviet radio jamming missions. On the extreme left elements of a Soviet BTR battalion can be seen deployed in a covering position to protect the Soviet left against a flank attack.

Above, Soviet armour prepares to advance over the a stream, with the intent of overwhelming the 311th Battalion and breaking into the German rear. The village of Gerbertshofen can be seen and is still in German hands. The Soviet plan required this village to be taken allowing supplies to be bought up for the exploiting Soviet tanks.

Below, another Soviet tank battalion moves forward. A number of Soviet battalions had reached the end of their command arrows. Now, German radio jamming missions added to the Soviet command problems. At this point the 311th Panzergrenadier Battalion was almost at breaking point. A concerted Soviet effort in fading light would have been devastating.

However, 312th Battalion had itself now moved on to the high ground to the rear of 311th Battalion. Once completed the Brigade’s position was stabilising, though it remained fragile.

At this point, with light fading, the Soviet attack began to slow. Clearly, the Soviet commander was in a strong position and the use of massed armour had clearly pressed the German defence to breaking. The 311th Panzergrenadier Battalion was significantly outnumbered and only the flexibility of German forces to reposition allowed the position to be maintained. Soviet artillery was both limited and ineffective, in stark contrast to German artillery fires. However, the Leopards of 311th Panzergrenadier Battalion, available only in company strength, stood no chance against the concentrated deployment of so many Soviet tanks. Achtung Panzer indeed!

Baltic Diversions

The deteriorating political situation in Europe during the summer of 1985 resulted in the forward deployment of elements of the French 7e Division Blindée (7th Armoured Division) to reinforce the Danish military. This reinforcement being itself a direct result of a number of Danish formations themselved having moved forward to forward deployment areas while Danish reserve formations had not yet fully mobilised. The French deployment, effectively a reinforced brigade, would result in one of the early clashes between French ground forces and the Soviets once hostilities began.

Soon after the Soviet forces crossed the West German frontier a series of naval landings occurred along the Baltic by Polish and Soviet Naval infantry. The landing by the 336 Naval Infantry Brigade would result in the dramatic clash between elements of the French 7e Division Blindée. As the naval infantry pushed inland French forces deployed to seize key terrain and conduct an aggressive couster-attack to halt the Soviet expansion of the bridgehead.

Limited intelligence of the immediate landing came from Danish covering forces, as well as reconnaissance flights by French Mirage jets. The staff of the 7e Division Blindée quickly developed a likely scenarios open to the Soviet commander. It was expected that a two naval infantry battalions would advance rapidly to seize two towns in the area of operations, the largest being Agestrup on the Soviet right and the smaller, Glattrup, in the Soviet centre. A third battalion would, it was expected, be directed towards a large ridge on the Soviet left. The Orders Group believed that a fourth battalion, possibly comprised of armour, would be held initially in reserve but would likely operate with this 3rd Battalion to advance against the French right and seize a key bridge on the Fensholt-Kildekrog road. Subsequent intelligence revealed this fourth battalion, of armour, was allocated out in support to the various naval infantry battalions.

To counter this scenario, and seize the initiative in the sector, elements of 7e Division Blindée were issued the following orders. Firstly, 35 RI (Regiment d’Infanterie) would advance on the French right secure a key road bridge and deploy in a blocking position to halt any Soviet expansion. Secondly, the main French effort would be on the French left where a daring operation was planned. Speed would be essential. The large town of Agestrup if seized by the enemy would be costly to retake. 5 RD (Regiment Dragons) would launch a rapid deep flank march that was to arrive on the enemy’s right flank. It was hoped this rapid attack would catch many of the Soviet forces in the open before they reached Agestrup. Simultaneously the 170 RI, mounted in VAB wheeled transports and lacking integral armoured support, would advance in support. One company would advance in road column directly towards Agestrup. To the left another company would advance across the rolling countryside. The third company, supported by specialised HOT ATGW vehicles and a divisional reconnaissance company, would secure a long ridge and deploy to overwatch positions. The attack would be supported by two self propelled F3 155mm battalions, retained in divisional support, as well as a TR-155 155mm towed artillery battalion dedicated to counter-battery fires.

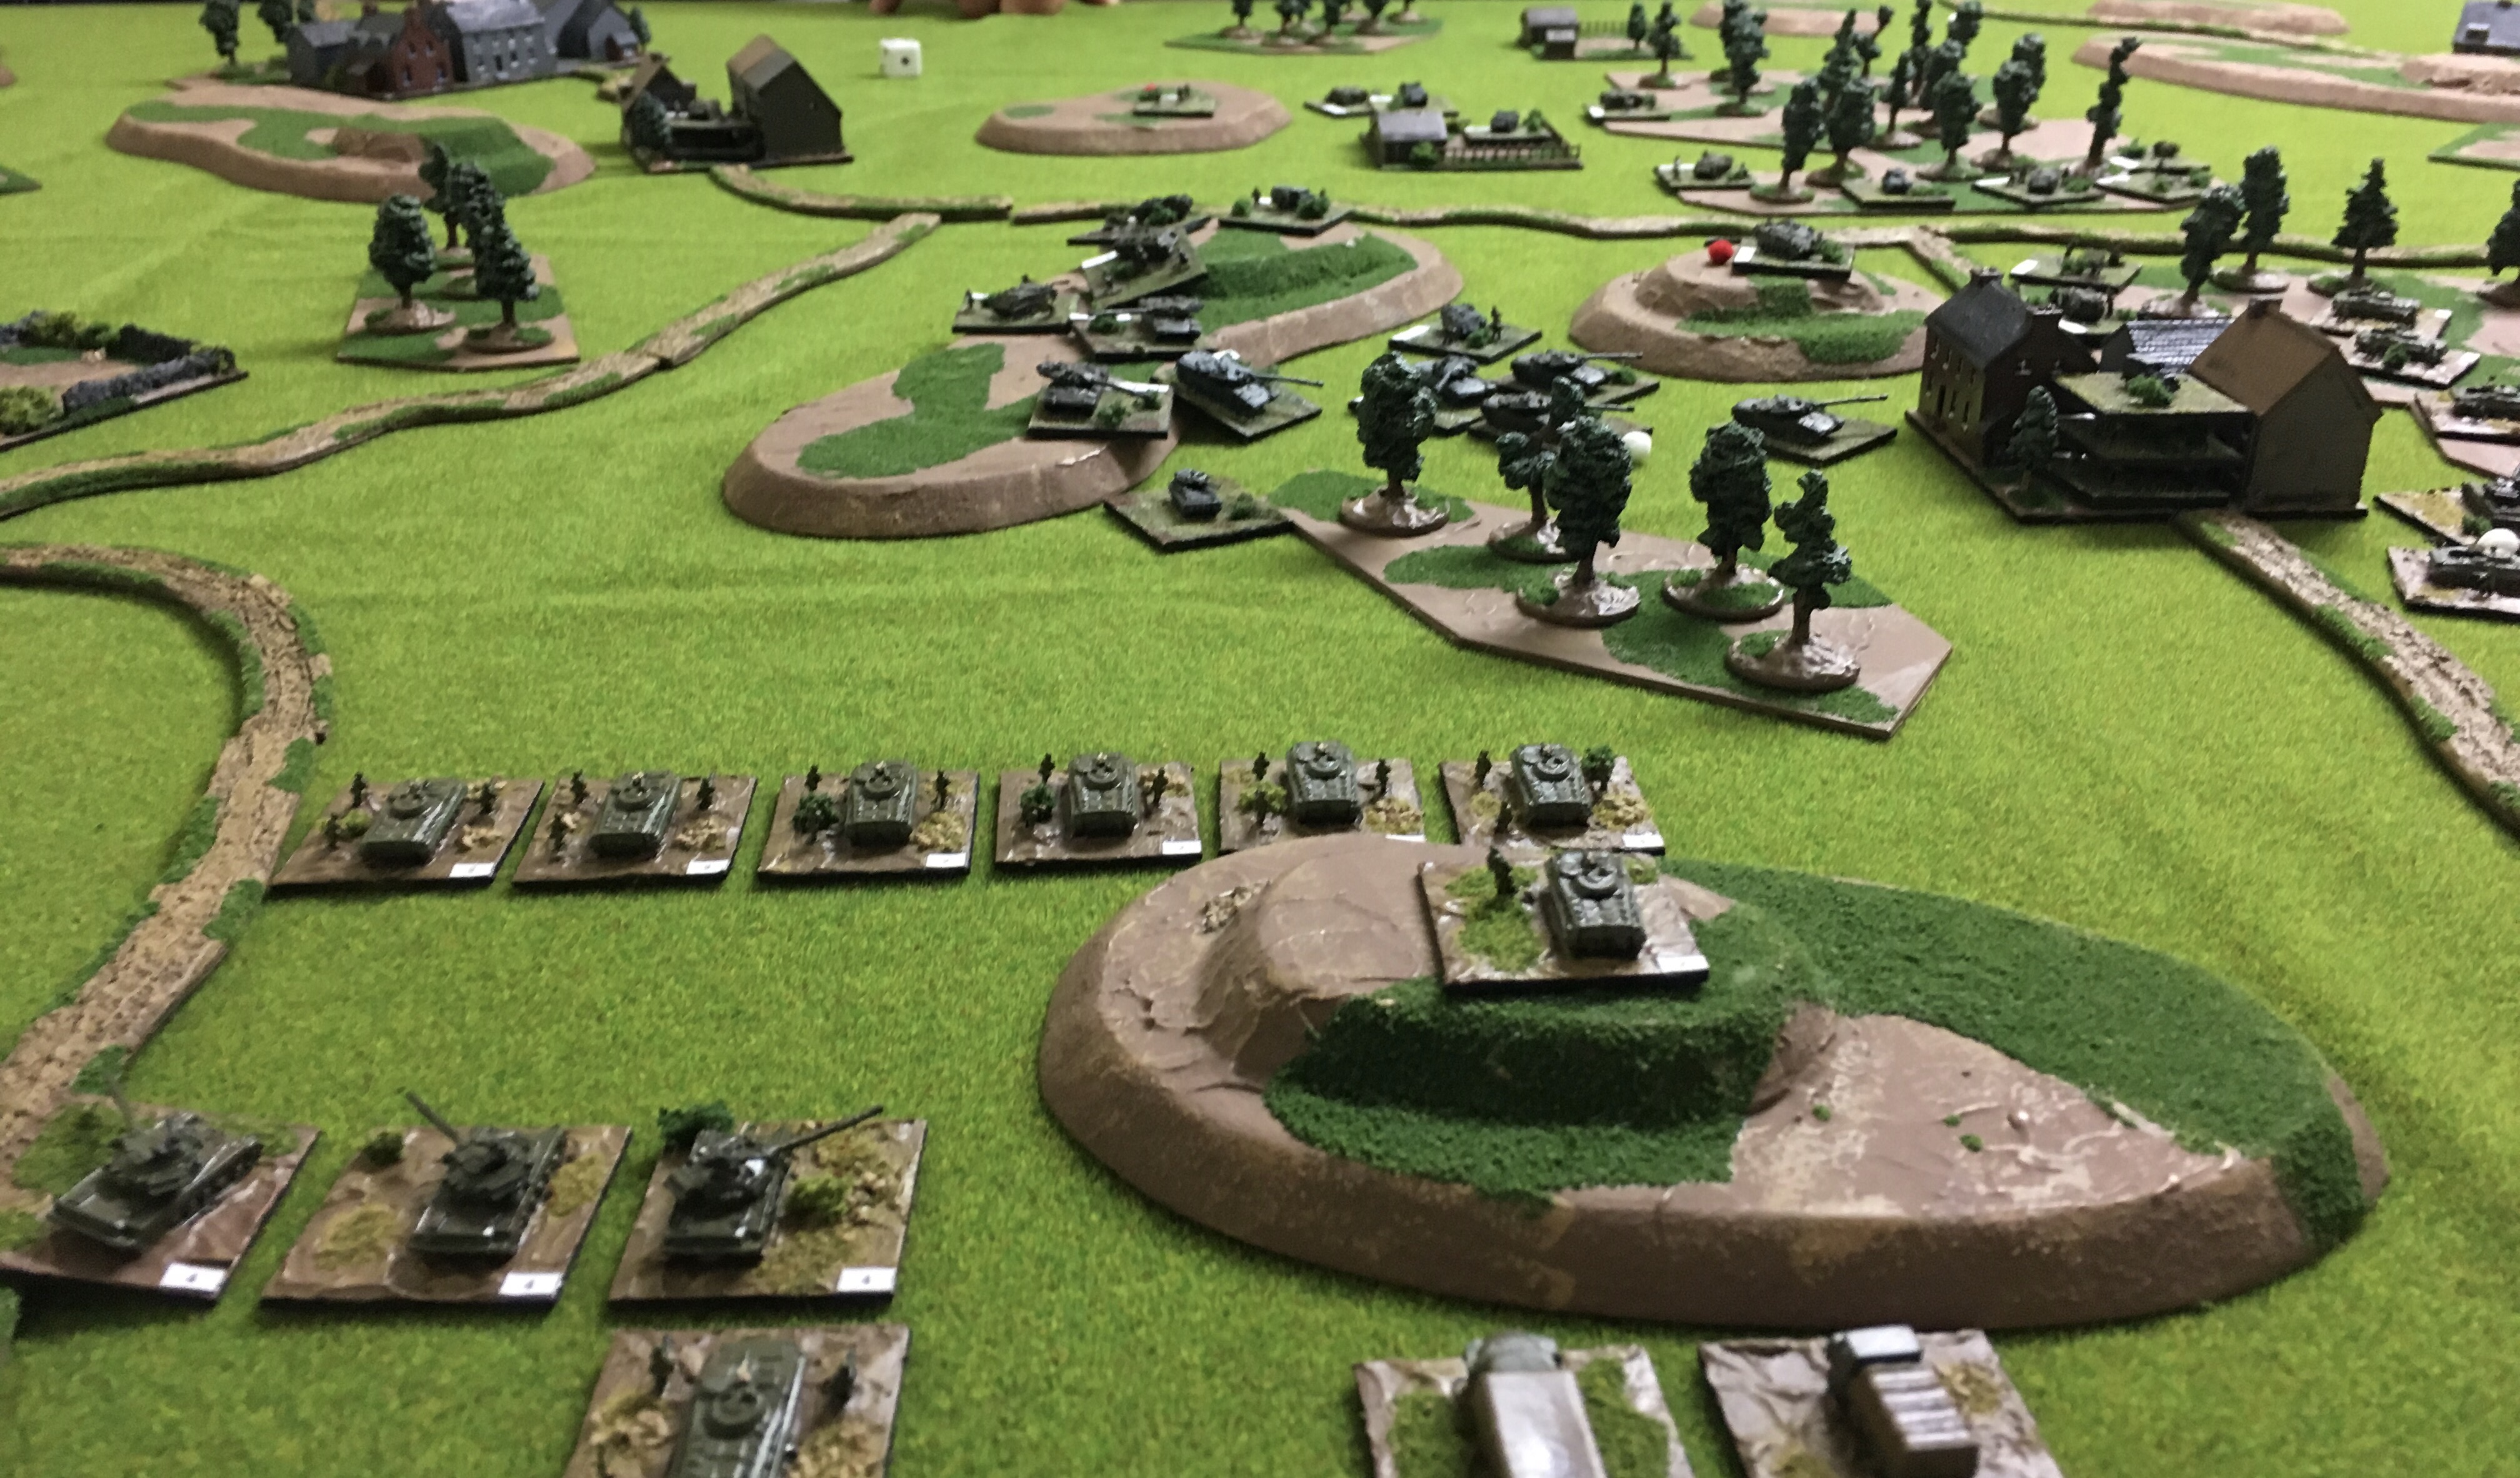
Above, the general situation with elements of the French 5 RB advancing on Agestrup, which is a five sector town in the left foreground. Soviet forces are advancing from the left with the town of Glattrup beyond Agestrup, and a long ridge top left. The French 170 RI is advancing from the right while 35 RI is just visible on the top right as it advances to its blocking position on the French right.

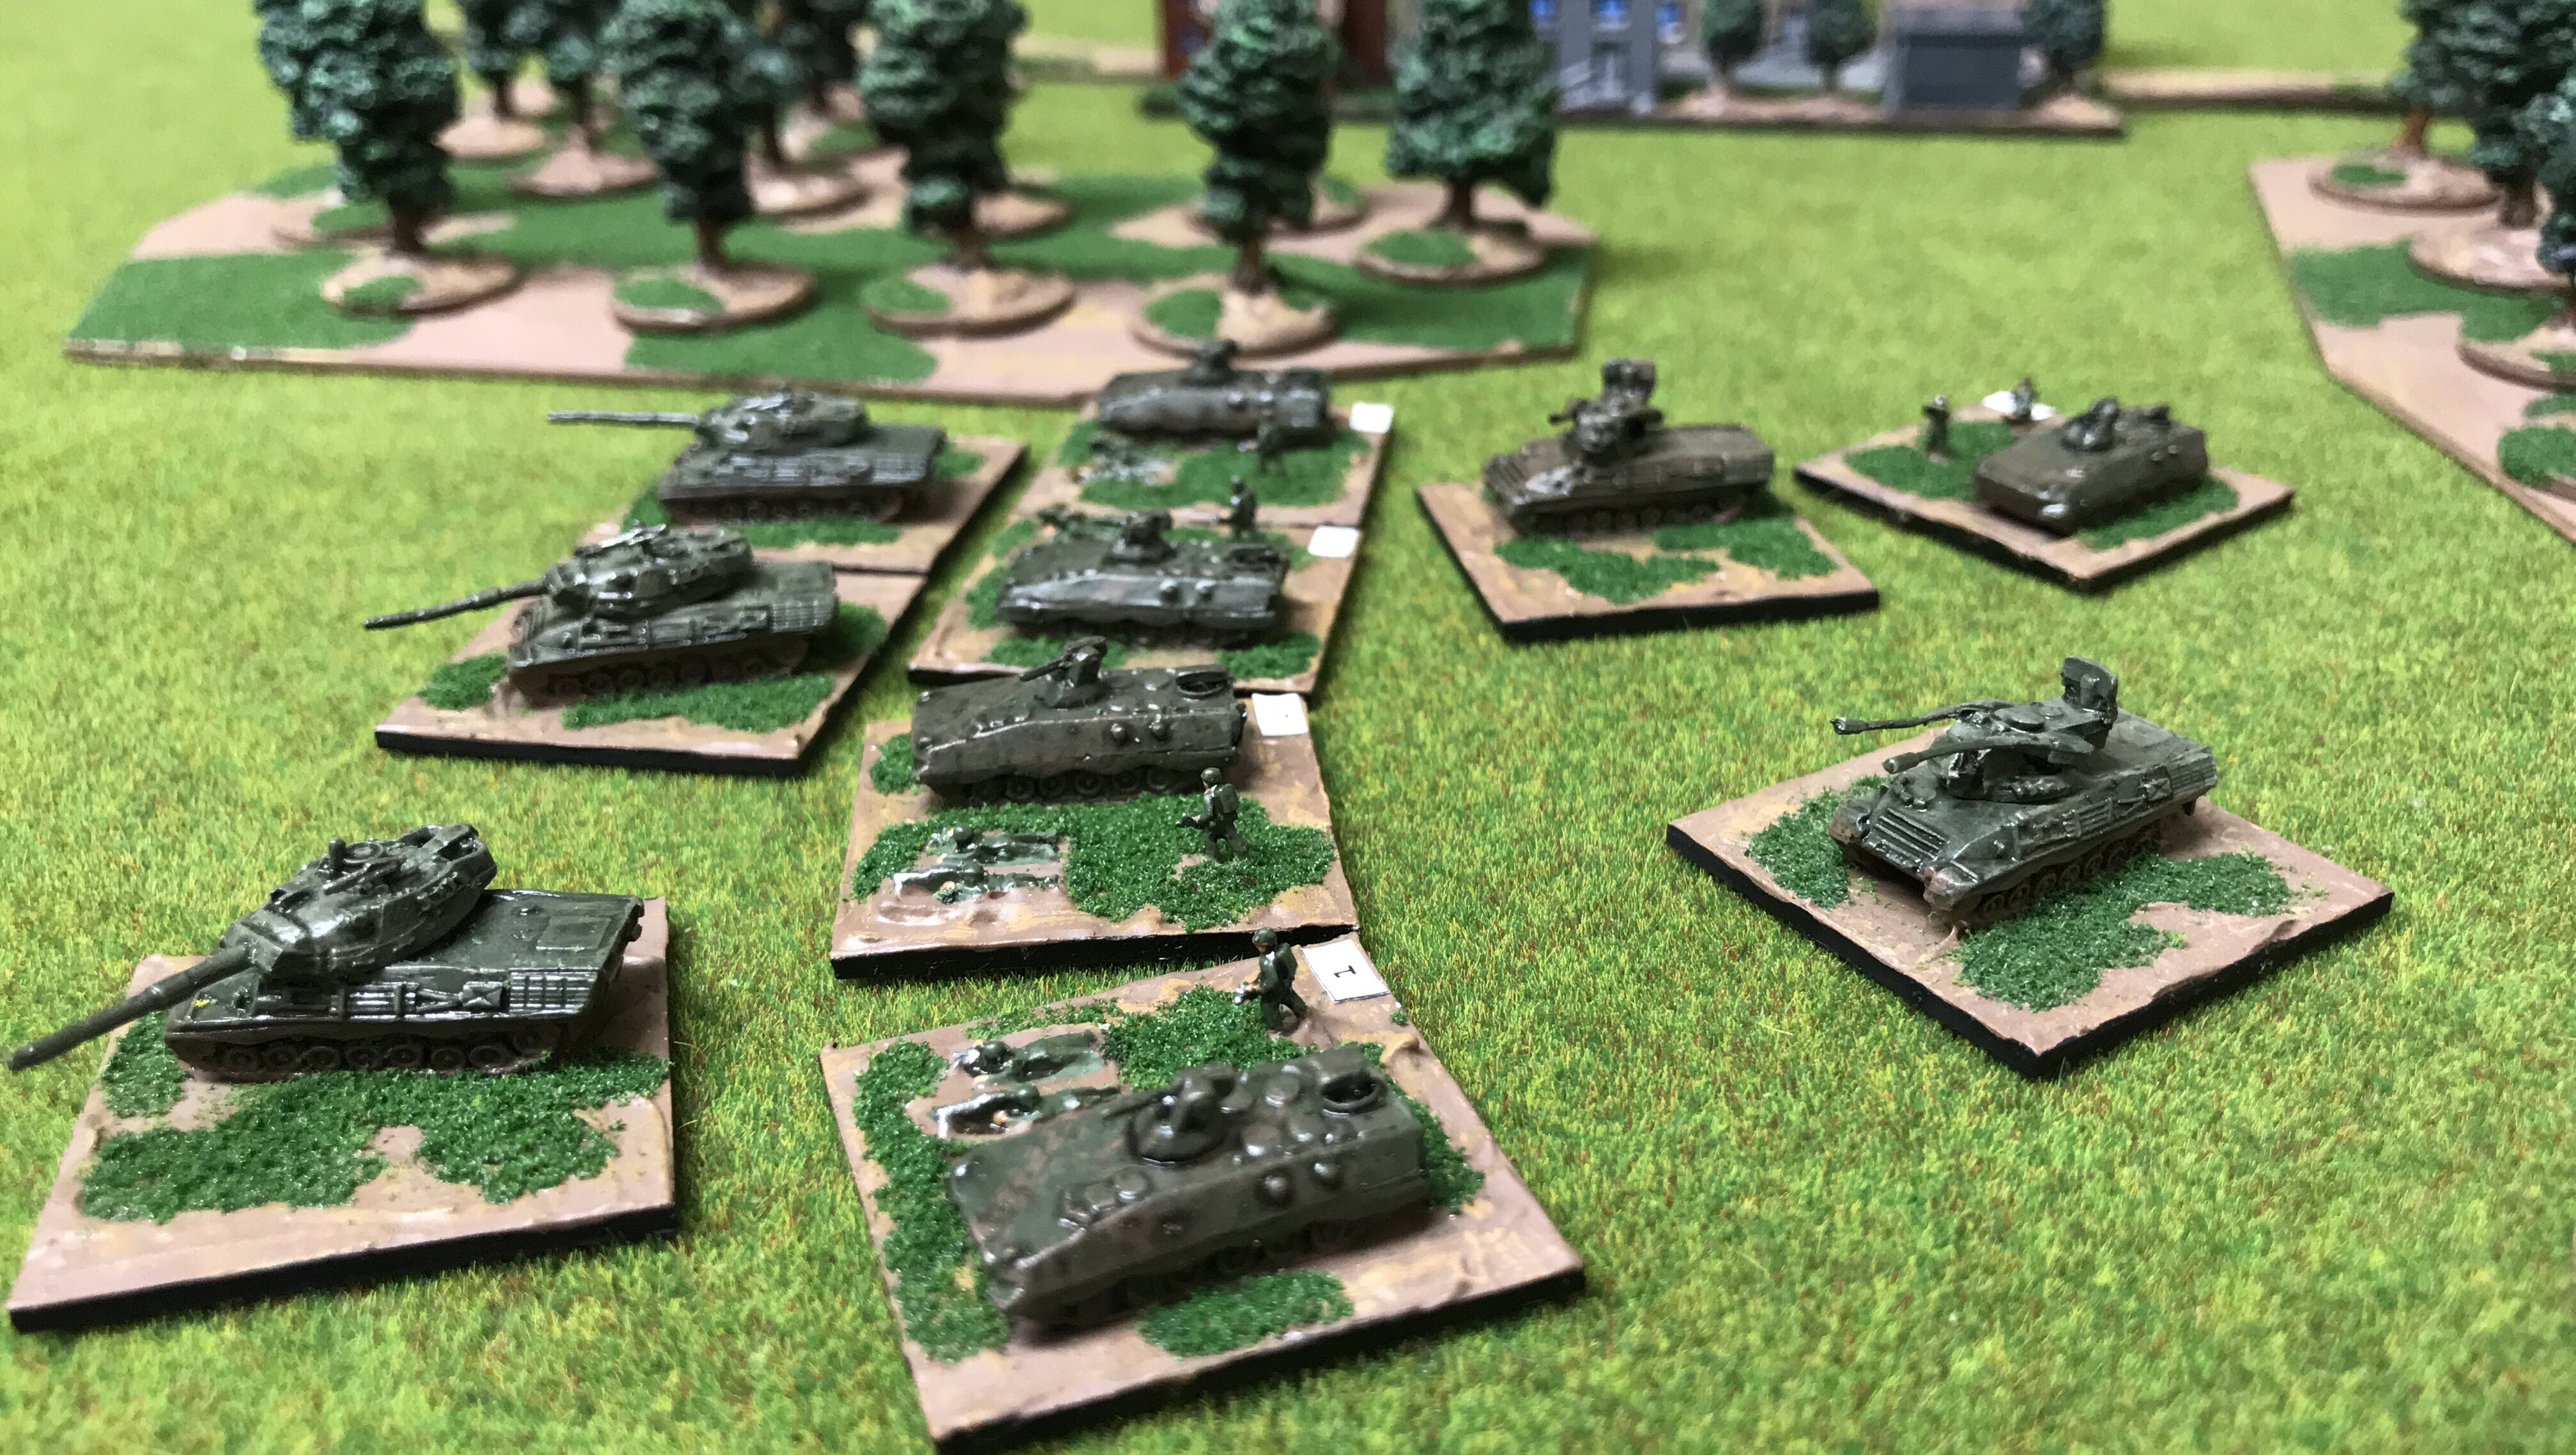
Below, another view of elements of 5 RB as they advance on Agestrup. The Soviet battalion here scattered on seeing the advancing French AMX-30 tanks and supporting mechanised infantry in AMX-10Ps. While many Soviet BTRs were able to reach the eastern sectors, and others deployed in the woods, the Soviet Battalion HQ was destroyed.

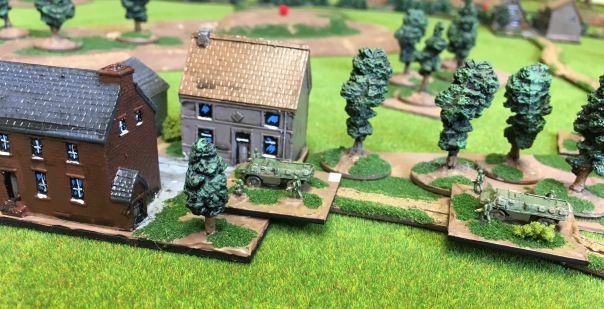
Below, a company of from 170 Regiment d’Infanterie, mounted in VAB APCs advance rapidly by road towards Agestrup seen here passing through a small Danish village. To allow this rapid move the command arrow for the regiment was drawn directly down the road.

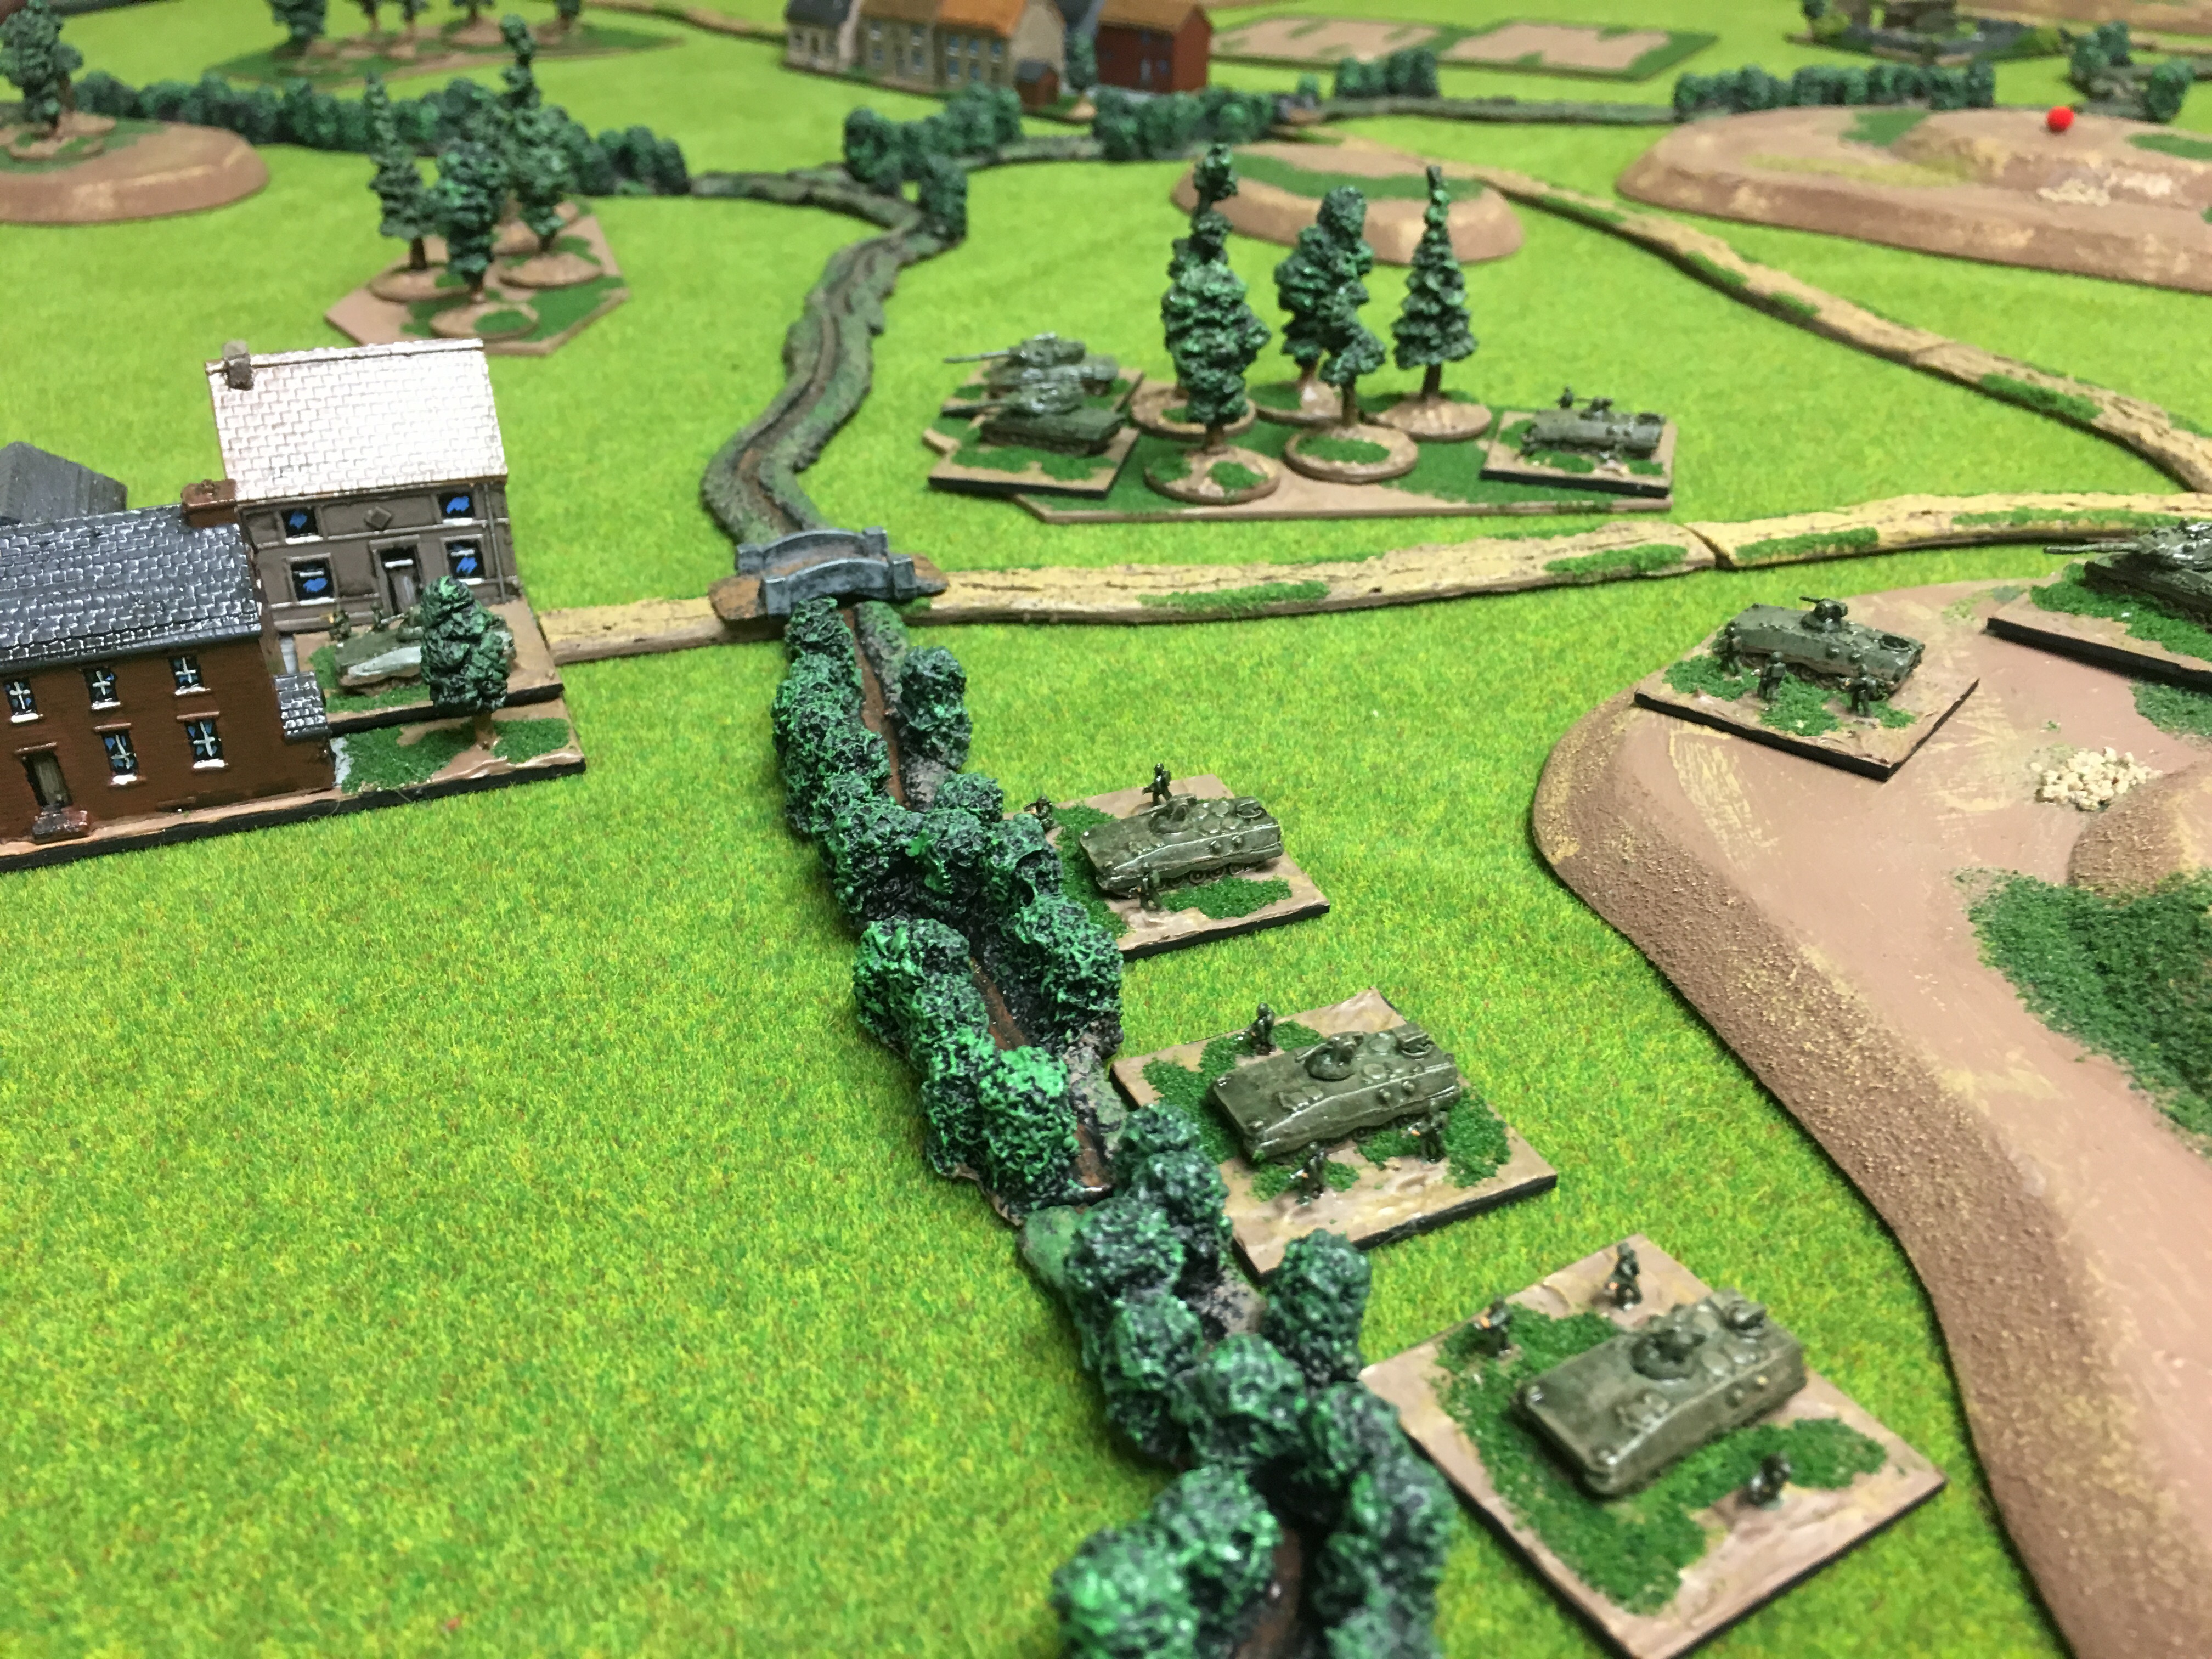
Supporting the regiment was an ATGW company equipped with HOT armed VABs. Behind the VABs are jeeps of the divisions reconnaissance company. The reconnaissance company would push forward after the ATGW vehicles had deployed into overwatch positions.

As the VAB equipped 170 Regiment d’Infanterie raced towards Agestrup the tanks of 5 RB started to manoeuvre to the flank and behind Agestrup where the tanks would eventually engage the rear of the Soviet forces. Desperate to halt the advance of the French armour Soviet Forward Observers, operating in support of the naval infantry, directed a massive Mutiple Rocket Launchers strike, below.

Fortunately casualties from the strike were limited, though several platoons were suppressed. The massive fire signature of the MRLs allowed French counter-battery teams to locate the MRLs. French artillery now targeted and destroyed the 140mm MRLs. This was the first of three Soviet MRL systems that were engaged in a series of effective French counter-battery fires.

Below, elements of the 35 Regiment d’Infanterie advance to secure a bridge on the French right. The regiment comprised three companies of mechanised infantry and one of AMX-30s. An AMX-13 DCA is visible on the right foreground and provided local AA protection. A Roland SAM system, providing expanded protection for the battle area is to the right.

Both French and Soviet forces conducted a series of electronic warfare radar location missions to identify and then target enemy radar systems as they shaped the battlefield for later air strikes. Long range Soviet SAMs were located but due to their range could not be targeted. However, local radar controlled gun systems were located, targeted and silenced.

Soviet operators were also active and located French Roland SAM. Additional Soviet MRLs as well as frigates firing in support struck the Roland deployed on high ground on the French right.

The tracked Roland SAM system was suppressed by these massive strikes, yet surprisingly the Roland systems soon recovered and relocated. Now, French artillery located this second MRL and silenced it.

However, the Soviets now had a window and with the Roland temporarily inactive a stream of Soviet SU-17s swept in to engage 5 RB near Agestrup.

Above, SU-17s engage AMX-13 DCA self-propelled AA gun systems, mechanised infantry and tanks using smart bombs. The use of these stand off weapons limited the ability of the DCA to disrupt the air attacks, especially with the Roland suppressed. While casualties from the air strikes were heavy, the regiment remained undeterred and 5 DB continued it’s advance.

Both combatants also conducted a series of radio jamming EW missions in an attempt to degrade and disrupt enemy communications.

The rapidly advancing infantry of the 170 RI looked likely to gain a foothold in Agestrup. However, the Soviet Naval Infantry also moved quickly. Just as the advanced VAB company arrived at Agestrup the final sector of the town was garrisoned by the Soviets, as can be seen above. All five sectors were now under Soviet control. Rather than assault the town 170 RI  would now switch to supporting the French main effort, a drive against the Soviet rear. Agestrup would be bypassed.

Above, AMX-30s of the 5 RB engage Soviet ATGWs. The support fires by self-propelled F3 guns were ineffective and the Soviets ATGWs were eventually overcome by tank fire.

Indirect fires by Soviet self-propelled 122mm guns were generally ineffective. However, after location the Soviet weapons were also subjected by heavy counter-battery fires by two French artillery battalions resulting in some 50% casualties, forcing the remaining Soviet guns to relocate.

Below, as the French armour pushed deeper some companies targeted towed Soviet ZSU-23 artillery and mortars while others engaged Soviet infantry and PT-76s. French armour and infantry would soon move into the woods catching a company of PT-76s redeploying.

Facing a now desperate situation Soviet commanders requested fixed wing air-support. Again Soviet EW teams located French Roland SAM which were immediately targeted by the third MRL battalion. Again the MRL failed to destroy the French SAM, and were themselves located and hit by further massive French counter-battery fires. However, for critical moments, the suppressed Roland were off-line and during that time a flight of Yak-38 aircraft conducted an attack using ICM.

Despite the air strike French resolve stiffened. Yet again the French armour moved forward. However, the advance would be short lived as Soviet naval Helix attack helicopters appeared over the Soviet rear. With no local AA systems operational the French armour was all but defenceless against this new threat.

Above and below the Helix gunships, allocated to tank busting, engage the AMX -30s of 5 RB. Visible on the left elements of a second naval infantry battalion can be seen forming a second defensive line while in the top left French reconnaissance teams fall back from Soviet positions.

Unable to continue the advance the 5 RB was forced to retreat. Now, and effectively unsupported, the advanced VAB companies of 170 RI broke-off their own advance, falling back to defensive blocking positions.

The Soviet Naval Infantry Regiment had secured its bridgehead. The French commander, accepting defeat, took some satisfaction that with the destruction of so many Soviet artillery systems. Two Soviet battalions were eliminated and two others had suffered 50% casualties. The Soviet 336th Naval Infantry Brigade would be unable to conduct offensive operations for some time.

This entertaining Mutual Encounter scenario was developed using the Scenario Generation System. Both forces comprised a basic 850 points. The French forces were however reinforced by an Option B, with a victory point penalty. Unfortunately the French fixed wing aircraft, that comprised much of this reinforcement option, were not engaged. The final result was a significant Soviet victory.

Drive on Mantinghausen

The following covers a recent Soviet hasty attack on a British defensive sector set in 1982 using a scenario developed with the Scenario Generation System. Both the British and Soviets opted for an Option A reinforcement. I’ve provided a little additional detail around the Soviet planning as background. The Soviets were commanded by Robin and I, while Andrew commanded the British.

Various thoughts ran through Major General Viktor Golubev’s mind as the divisional operations officer completed the orders group. Had he considered the enemy deployments sufficiently? The reconnaissance reports indicated he would be engaged against a British brigade comprising tank and mechanised infantry. While the maps indicated the terrain on the enemy right was more open indications of ridge lines and British armour heavy formations were of concern. Was his decision weight his attack against the British left correct? Would the attack through a large wood against the high ground that dominated the forward centre of the British position be successful? Certainly he was concentrating his effort as the attack would initially utilise two mechanised battalions, soon rising to three. Would the battalions have sufficient strength to press on to the secondary objectives where a second British mechanised battalion was located. But what of the British tanks? His intelligence officer indicated the British armour would remain in place, but would it? There were so many variables to consider. Then his mind was drawn his two regimental commanders tasked with the divisions immediate objectives. He wondered if each of his commanders were up to their respective tasks or if the would flinch at the critical moment? Would they make sufficient use of the resources allocated? Only time would tell…

By 3pm the advanced elements of the attack were committed. Elements from two Motor Rifle Regiments were allocated to the phased assault with each regiment allocating two reinforced battalions to the advance. On the left the BMP equipped regiment advanced in two groups. The first was tasked with advancing and clearing a large wood and small village before swinging left to secure high ground. Reconnaissance suggested the wood line would be held by infantry, yet the threat of British counter battery fires precluded pre-planned fires. Instead, it would be a silent attack with the artillery on-call. To the left of the battalion a second BMP battalion was held in reserve to provide flank protection and support for follow-on operations.

To the right of the BMP Regiment elements of a BTR Motor Rifle Regiment advanced. The 1st BTR Battalion was to advance along a route that ran parallel to the BMP battalion so it would strike the flank of the woods while potentially clearing a key village on the battalions right flank. In support a further BTR battalion would advance on flanking movement to the right of the village. Delays for this battalion were expected due to the approach march required. However, it would provide additional elements which would ensure the village, the other initial objective, was secured. On the extreme right a divisional reconnaissance company was tasked with deep reconnaissance of secondary objectives. The BTR Regiment would then press deeper into the British flank securing the secondary objective while the BMP Regiment would halt the expected British armoured counter-attack. In support of the four reinforced battalions were each regiment’s 122mm D-30, a divisional 152mm battalion as well as two battalions of 203mm towed guns for deep counter-battery fires. The SAM systems were prepared and included Gaskin, Gecko and Guideline and supplemented by ZSU and SA-7.

Above, the view from the north with Soviet forces entering from the east (left). The immediate Soviet objectives are the high ground on the centre left, behind the village and the village in the left foreground. The secondary objective is the village in the right foreground.

Below, the 1st BMP Battalion advances towards its primary objective, the small hill that dominates the village on the right. The BMPs, supported by a company of T-64B tanks soon came under fire by Abbots and light mortar fire. Swift Soviet counter-battery fires forced the Abbots to relocate. While Soviet radio jamming disrupted many new requests for support fires.

To the right of the 1st BMP Battalion the 1st BTR Battalion advances, shown below. Supported by T-62 tanks this battalion was soon engaged by dismounted Milan teams, just visible in the wood line, of British 2 Para. Again British artillery fires, from a second artillery battalion, supported the defence. These fires caused increasing casualties among the Soviet forces. However, again the British self-propelled guns were hit by Soviet counter-battery fires. Suffering casualties the Abbots were forced to relocate. The village on the centre right though an objective was to be bypassed initially while the battalion concentrated on the main attack. Eventually 2 Para would fall back leaving a now isolated company to hold this village.

The artillery fires were not all in the Soviet favour. Divisional level D-20 152mm guns attempted to neutralise the Milan teams. These were almost immediately located and hit by British counter-battery M110. The entire Soviet battalion was eliminated. The M110 were however located by Soviet M-1955 towed guns. Suffering casualties they too were forced to relocate.

Below, another view of the advancing 1st BTR Battalion. The situation was critical and with casualties mounting the political officer at Regimental HQ was “encouraging” the Regimental Commander to press forward.

Below, the Soviet 1st BMP Battalion presses its advance towards the woods while a platoon of T-64B tanks and ZSU-23-4 support the BTR advance by engaging the Milan. The BMP Regimental D-30 towed 122mm guns also conducted artillery fires against these Milan. After firing for a period the towed guns were moved to a secondary location to avoid British counter-battery fires.

Using combinations of armour, ZSUs, 122mm artillery and 120mm battalion mortars the Milan teams were finally eliminated.


Above, the Soviets BMPs press forward. With the British paratroopers deployed mostly within the woods, rather than on the edge, the BMP mounted infantry advanced into the woods where they drove back the British paratroops. Again the village was ignored.

Behind the village elements of a British mechanised battalion can be seen on high ground and moving into the wood in a desperate effort to support the British paratroops. The forward deployment of this British battalion was unexpected. The BMP battalion’s towed 120mm mortars were particularly active supporting this sector and caused considerable disruption to the British infantry. The 120mm mortars were now themselves subjected to a massive counter-battery fire by M110, with devastating results.

Meanwhile, on the British right, the unengaged armour heavy battalion had been ordered to move from its defensive position in a counter-attack. Above, a portion of the battalion deployed before the Soviet attack, mechanised infantry were deployed in the town behind the village in the foreground. The ridge provided a strong blocking position and any attack here by Soviet formations would have ended in disaster, despite the small number of British tanks.

Below, the Chieftains on the move. The small two contour hill on the right is the BMP battalion initial objective. The British armour heavy battalion is now operating without mechanised infantry and is about to pass through elements of a seperate mechanised infantry battalion and attack the 1st BMP Battalion left flank. A difficult task which impacts greatly a formations ability to engage enemy.

Below, the British armour moves over a ridge line and advanced elements begin to engage the 1st BMP Battalion at 1500m. Additional dedicated ATGW systems, concentrated T-64Bs or helicopters would have been extremely useful at this point!

Instead with rapidly fading daylight the Soviet reserve battalion was committed. It now advanced against the exposed British right flank.

Above, British Scorpions, forward of the Chieftains, engage the rapidly advancing BMPs while T-64Bs begin to engage Cheiftains. In the centre right BMP SA-7 teams deploy to high ground. The Soviet commander was continually concerned about British Lynx or fixed wing air attacks, which never appeared!

Unfortunately, we had to call time at this point with the game very much in the balance. The engagement had been excellent and highlighted many of the strengths of Modern Spearhead, when combined with a well balanced scenario. With neither the Soviets or the British having a complete understanding of the enemy force suspense was maintained throughout. The well coordinated British defence had proven a difficult task to penetrate. Yet supporting attacks and maintaining a focus of effort had rewarded the Soviets, though their objectives were yet to be secured. Artillery fire had been heavy and both protagonists had exhausted their main counter-battery assets. The flank marching Soviet BTR battalion having arrived late was now pressing forward. Supported by D-30 122mm artillery this, along with the other D-30 artillery battalion of the BMP Regiment, would now provide much needed artillery support. EW missions, in the form of Radio Jamming, had proven useful to the Soviets. The threat of British air strikes had failed to materialise, though the threat haunted the mind of one Soviet commander! Meanwhile the other Soviet Regimental commander lamented the lack of Soviet helicopters or fixed wing air support. He argued they would have been very useful providing critical support against the advancing British armour. He was correct, perhaps next time…